Google Pay™
Accept Google Pay payments in your online store.
Google Pay allows your customers to make payments in your app or website using a credit or debit card added to their Google account. Use the emerchantpay Payment Gateway API Google Pay documentation to accept Google Pay as a payment method across all of emerchantpay’s payment integrations.

| Payment method | Countries/regions | Supported payments |
|---|---|---|
| eWallet | Global (see list) | Card (Visa, Mastercard) |
Before you begin
Before you start integrating Google Pay, review the options and requirements for your setup. This section will help you choose the right integration method, confirm your prerequisites, and complete all necessary setup tasks with emerchantpay and Google.
Choose an integration method
Choose how you want to integrate Google Pay:
| Integration Method | Details |
|---|---|
| emerchantpay Payment Gateway API |
Use the emerchantpay Payment Gateway API Google Pay documentation to process payments through the emerchantpay payment gateway.
|
| Web Payment Form (WPF) |
A simpler, low-code option using emerchantpay’s hosted payment form.
|
Prerequisites
Before integrating Google Pay, ensure you have:
- An active emerchantpay account. Apply here.
- Integration credentials appropriate for your setup:
For Web Payment Form (WPF) integrations:
- No Google Developer setup or Merchant ID is required.
- You can use emerchantpay’s Google Pay credentials.
- Contact tech-support@emerchantpay.com to have the credentials configured for your WPF processing.
- Add one of the following gateway domains to your Google Pay Console:
wpf.emerchantpay.netwpf.e-comprocessing.net
- In your Google Pay Console, go to Google Pay API → Integrate with your website, select Add Website, enter the domain, choose Gateway as the integration type, and submit required buyflow screenshots.
For server-to-server (S2S) integrations:
- A valid Google Merchant ID. See Apply for production access.
- Contact emerchantpay support to link your Merchant ID to your account. It will appear as the Registration Number in the Gateway Console.
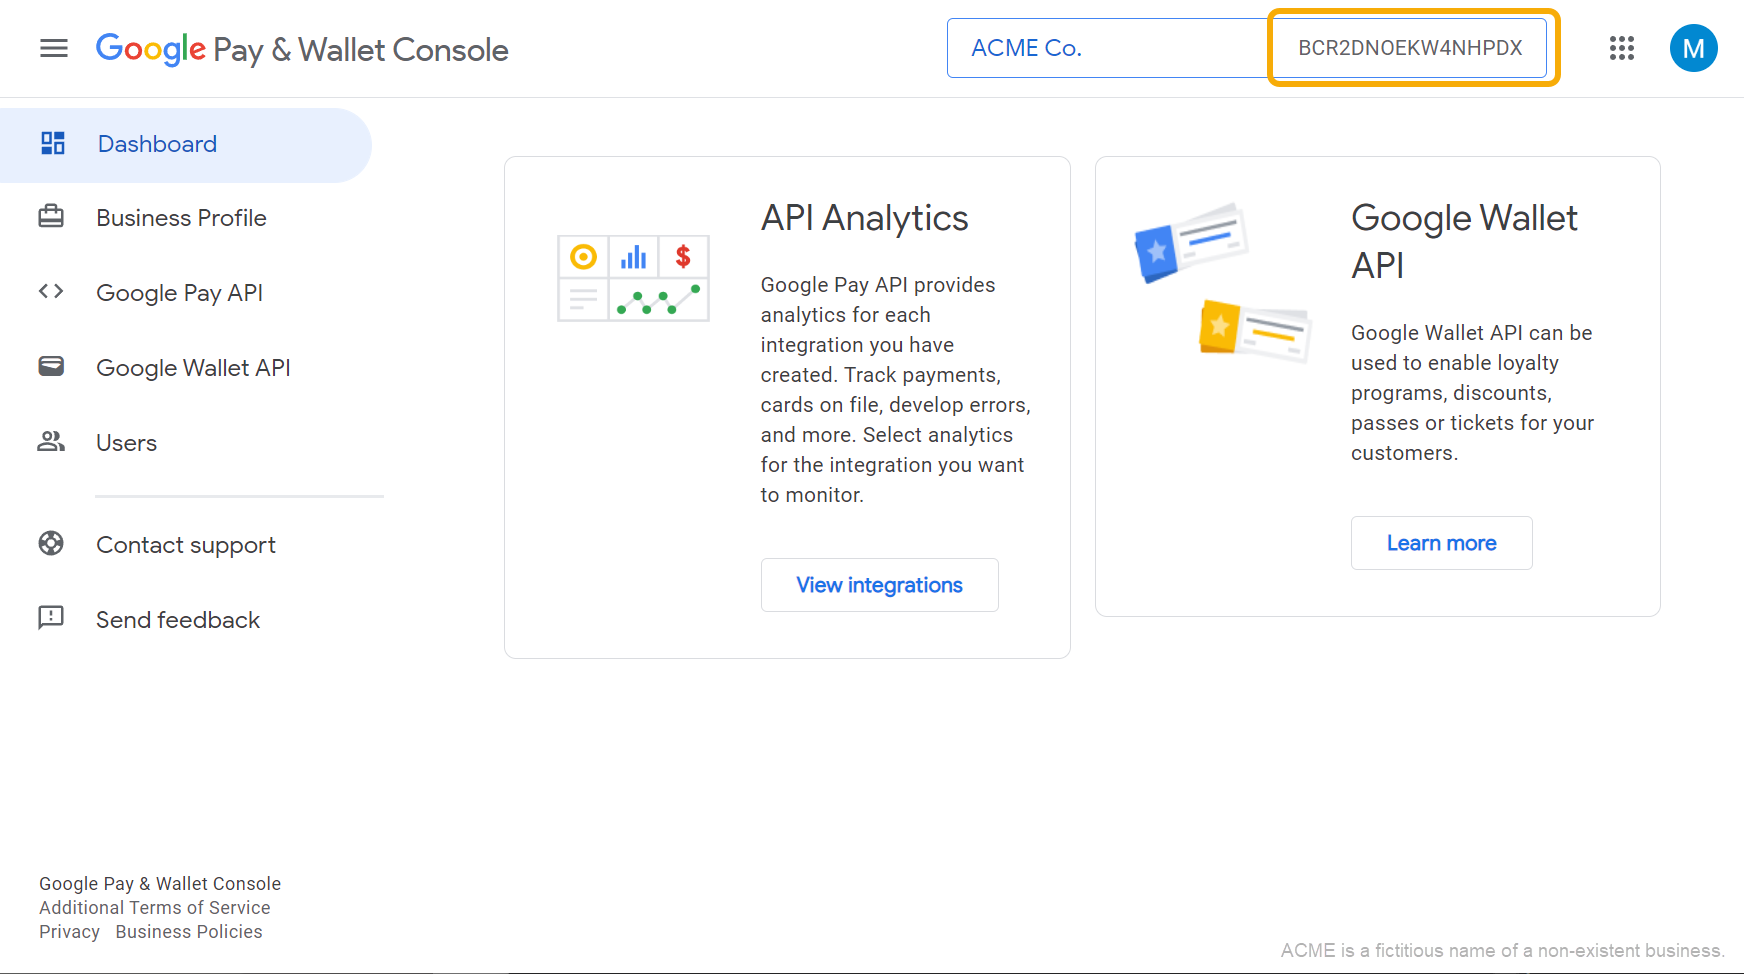
- Your Google Merchant ID can be found in the top-right corner of your Google Pay & Wallet Console dashboard.
- Use your
gatewayMerchantIdto securely encrypt payment tokens. - To use cards stored in Google accounts, enable the PAN_ONLY authentication method. Contact tech-support@emerchantpay.com to modify this or enable 3D Secure for PAN_ONLY.
Set up your environment
Complete the steps below to prepare your Google Pay integration, depending on your chosen method (Web Payment Form or server-to-server integration).
Integration checklist
Add your Google Merchant ID for a server-to-server integration with the emerchantpay payment gateway
Your Google Merchant ID is located in the top-right corner of the Google Pay & Wallet Console:
Once added by our support team, your Merchant ID will appear as the Registration Number in the Merchant Details section of the Gateway Console:

Configure Web Payment Form (WPF)
To process Google Pay payments using the emerchantpay Web Payment Form (WPF), you must add an emerchantpay gateway domain to your Google Pay merchant account.
- Open the Google Pay & Wallet Console.
- Select Google Pay API in the navigation menu.
- Under Integrate with your website, click Add Website.
- In the Website URL field, enter one of the following:
wpf.emerchantpay.netwpf.e-comprocessing.net
- In the Integration type field, select Gateway.
- Contact tech-support@emerchantpay.com to provide the required screenshots of your buyflow.
- Click Save.
- (Optional) To add another domain, repeat from step 3.
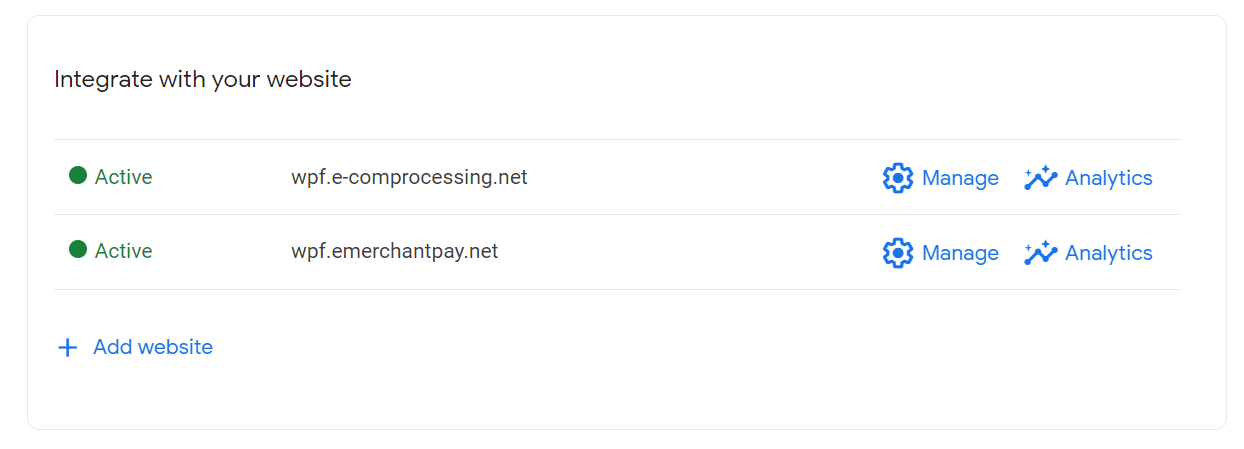
Once added, the domain will appear under Integrate with your website in your Google Pay Console:
Integration steps
Once your Google Pay environment is set up, you’re ready to integrate. The steps below guide you through authorising, processing, and testing Google Pay payments using the emerchantpay payment gateway.
1. Authorise a Google Pay payment
After your customer selects Buy with Google Pay at checkout, the Google Pay API will return an encrypted payment token containing the unique transaction information.
{
“signature”:”…”,
“intermediateSigningKey”:{
“signedKey”:”{
“keyValue”: “…”,
“keyExpiration”: “…”
}”,
“signatures”:[…]
},
“protocolVersion”:”…”,
“signedMessage”:”{
“encryptedMessage”: “…”,
“ephemeralPublicKey”: “…”,
“tag”: “…”
}”
}
2. Create a Google Pay payment request
After the payment token is received, create a Google Pay payment request to the emerchantpay payment gateway. Specify the encrypted payment token in payment_token and the payment type in payment_subtype.
Accepted Google Pay payment types:
<?xml version=”1.0″ encoding=”UTF-8″?>
<payment_transaction>
<transaction_type>google_pay</transaction_type>
<transaction_id>119643250547501c79d8295</transaction_id>
<payment_subtype>authorize</payment_subtype>
<payment_token>
{
“signature”:”…”,
“intermediateSigningKey”:{
“signedKey”:”{
“keyValue”: “…”,
“keyExpiration”: “…”
}”,
“signatures”:[…]
},
“protocolVersion”:”…”,
“signedMessage”:”{
“encryptedMessage”: “…”,
“ephemeralPublicKey”: “…”,
“tag”: “…”
}”
}
</payment_token>
3. Receive a response
You will receive a Success or Error response to your payment request.
Example of a Success response: <?xml version=”1.0″ encoding=”UTF-8″?>
<payment_response>
<transaction_type>google_pay</transaction_type>
<status>approved</status>
<mode>live</mode>
<transaction_id>119643250547501c79d8295</transaction_id>
<unique_id>44177a21403427eb96664a6d7e5d5d48</unique_id>
<consumer_id>123456</consumer_id>
<avs_response_code>5I</avs_response_code>
<avs_response_text>Response provided by issuer processor; Address information not verified</avs_response_text>
<authorization_code>345678</authorization_code>
<response_code>00</response_code>
<timestamp>2022-05-24T17:25:03Z</timestamp>
<descriptor>Acme Co.</descriptor>
<amount>100</amount>
<currency>USD</currency>
<sent_to_acquirer>true</sent_to_acquirer>
<scheme_transaction_identifier>019091214161031</scheme_transaction_identifier>
</payment_response>payment_subtype, you can capture and settle the customer transaction. See the emerchantpay Payment Gateway API Transactions documentation for more information.
4. Test your integration
Use a Google Pay test card to test your Google Pay integration:
- Add an item to your cart in your online store.
- Proceed to the checkout page and check out using Buy with Google Pay.
- Pay using one of the test card details.
- Log in to the Gateway Console.
- In the navigation menu, go to Payment transactions.
- Verify that the transaction appears at the top of the list and is successful.
5. Accept live payments
After you have successfully tested your Google Pay integration, you are ready to move to the production environment and accept live payments from your customers. Contact your emerchantpay Account manager to get your login credentials for the production environment.
You are now ready to accept live payments from your customers using Google Pay.
Google Pay is a trademark of Google LLC.